Welcome to my blog

I will be posting pictures of layouts and cards that I have made, hope you enjoy looking.


Friday, July 16, 2010

Layouts with pictures

This layout I put together at a crop I attended in May. Just love these pictures. She is so funny!
This is my "Girly Girl" layout I done a few months ago. I took these pictures of Emily out in the yard, playing ball and checking out the day lillies.
Here's my "Emily's Almost 2" layout, more pictures of her out in the yard.
 Feel free to leave comments.
Thanks for looking! Have a wonderful day!

Jitterbuggin Challenge Sketch #9

This is a card I made for the Jitterbuggin challenge. The papers are all from the Chirstmas Mat stack(DCWV). The pink ribbon is just some that I had, from Wal-mart as are the buttons. The daisies are Martha Stewart. "love" was cut using Home Decor Cricut cartridge. The card base is a half fold card for inkjet printers, cut down to 4.5" x 6.5".
I flipped the sketch, hope thats ok.
Here is a close up of the buttons. I threaded them on, they will slide along the ribbon if I want to move them.
Here are the daisies up close.
Here I show I used a strip of the green on the inside of the card.
I hope you enjoyed looking! Please feel free to leave comments, love hearing form you. Thanks and have a wonderful day!

Tuesday, July 6, 2010

Sorry I have not been able to post anything new for a while. Not easy scrappin with a (almost) 2 year old in the house. I have gotten a few new carts. lately, I will try to get something new up. Have a wonderful day!

Thursday, June 24, 2010

Submission for Jitterbuggin Challenge


This is my card that I made for the Jitterbuggin Challenge.

The base is cardstock cut at 5 1/2" by 8 1/2" . The white and blue are from the scraps bag, red shiney paper is from Citrus (DCVW). The "Happy" was cut using Christmas/Noel ( the solutions cart. that is retired) cut at 1 1/2 in.  The "4th" was cut using Jasmine  cricut cartridge, 4 cut @ 1 1/2" and th cut @ 1". Close up of the "4th". The ovals were also cut using the Jasmine cricut cartridge and both are "poped" for a little extra umph.

Here's a close up of the ribbon, just some I had so I don't have a name for it (sorry). I cut the 2 smaller stars at 3/4" and the middle one at 1" from Jasmine cricut cartridge.
Well that's all I have for now. I hope to post a couple more things tomorrow, if I don't get interupted too much that is. LOL.  Thanks for looking, please feel free to leave comments. Have a wonderful day.

Monday, June 14, 2010


Here is my card for the Jitterbuggin challenge.
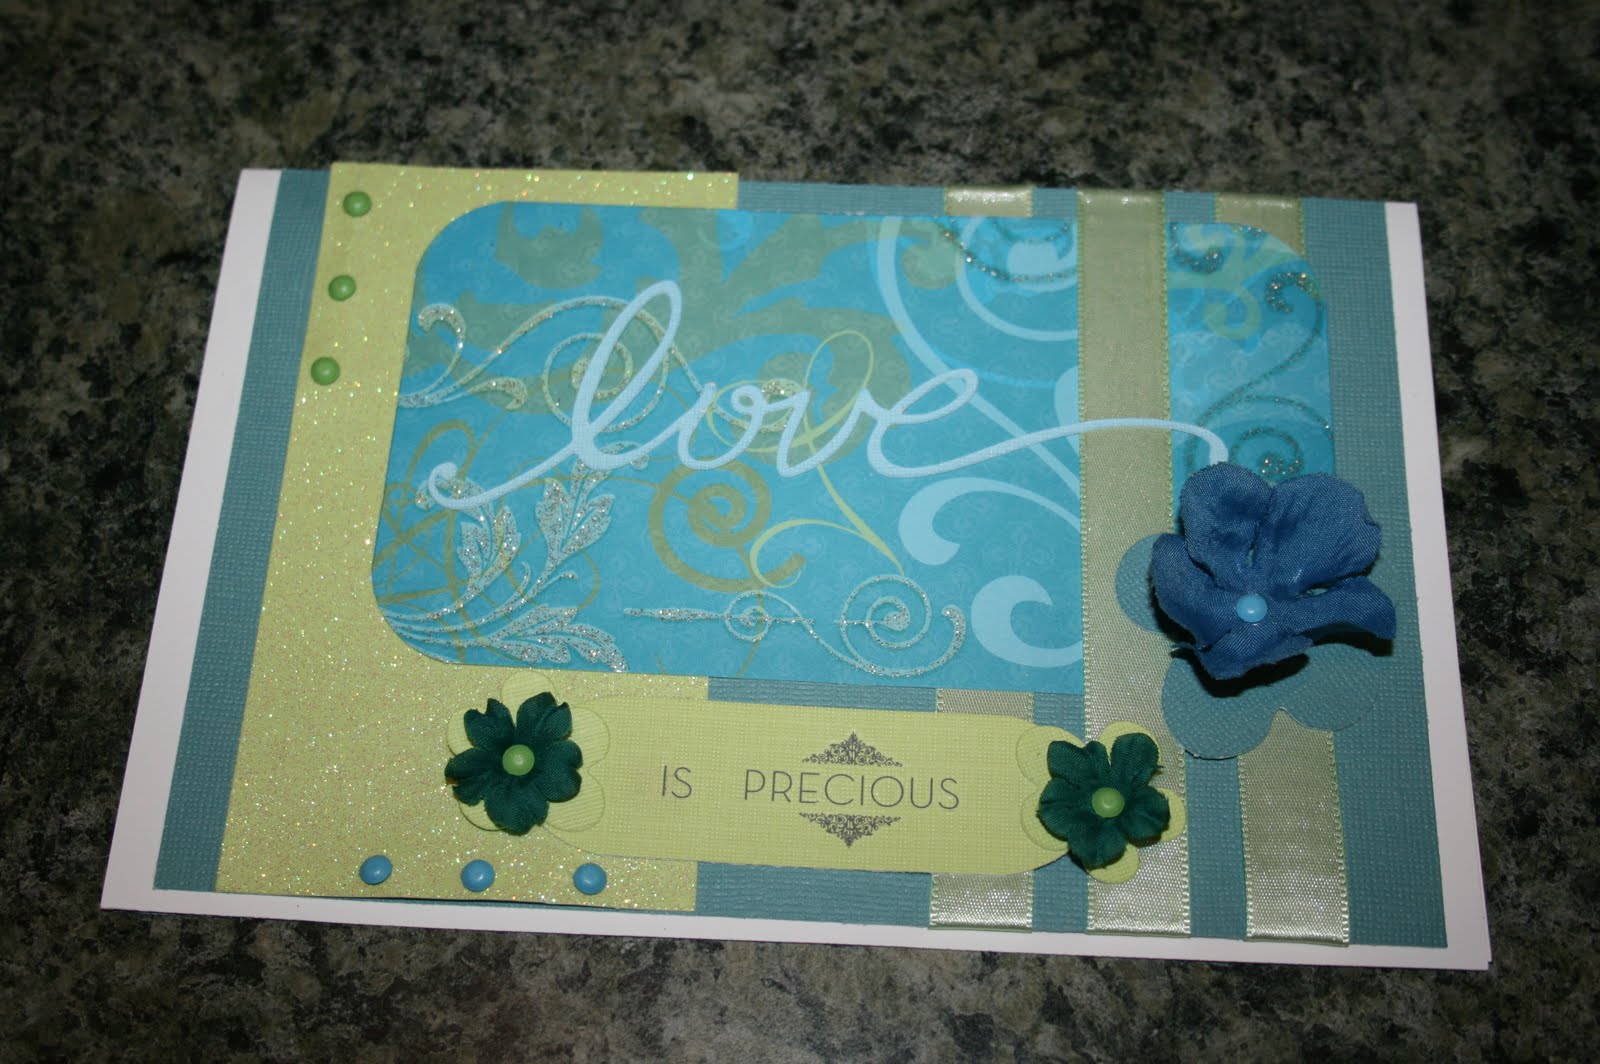
The base is a card for an ink jet printer (Hewlett-Pcakard), the solid base and flower under blue flower is coredinations cardstock, green glitter, tag, flowers (under green flowers) are all from Christmas mat stack. The ribbon is from Hobby Lobby and designed paper is from All Dressed Up mat stack (DCVW). The "silk" flowers were from Wal-mart.
Here you can see the flowers under the flowers. I used Home Decor cricut cartridge to cut the flowers and "love".

The "is precious" is from 2 precious rub ons.
Love is precious and we should  treat is as such. I hope you enjoyed looking, feel free to leave comments. Love hearing from you. Have a great day!

Friday, June 11, 2010

Girly Girl


Here is a layout that I put together this week. I wanted to do a layout in all pink for my daughter, so here it is. Hope you like it.
The base is pink cardstock, wausau classics. The floral is from the paper studio - Sweet Pea stack. Glitter paper is from Christmas mat stack, the ribbon is from Hobby Lobby, the plain mat is Coredinations - Nostalgia stack and the base of two of the small mats is also from the Coredinations stack the the other two are from Christmas mat stack. The font is cut from Jubilee cricut cartridge and the flowers are form Storybook cricut cartridge.
Page 1
Close up of page 1Page 2Close up of page 2I wanted to keep this page simple, but the glitter paper gives it a touch of flair! I really enjoyed doing this layout. I am going to put pictures of my daughter in various pink dresses on this layout, she has several, so all I have to do now is take some pictures and get them printed.
I hope you enjoyed looking, please feel free to leave comments! Have a wonderful day!

Wednesday, June 2, 2010

Gift Card Holders

Here are some gift card holders I put together today and last night. This one I didn't have the right color of ribbon to go with it, so I just used what I had for an example. The papers are just some from the scraps bag, ribbon is from Wal-mart (years ago) and the buttons are also from Wal-mart. I used a Martha Stewart corner punch on the top corners.


For the buttons, I just knotted one end of the ribbon and put it through the holes on the back side button first then the front one, pulling the ribbon back through the hole to the back. Make the ribbon long enough to go around the holder at least once. I made mine long enough to go around and wrap around front button a couple of times and back around to wrap around the back button a couple times.  Sorry I didn't measure.
Here is the back of my card holder. You could do the oppisite and have the ribbon end on the front .
This one I just put a ribbon rose in the center and put a couple brads on the sides.

This one I just glued the two sides together cut the flower from some printed paper and used the corner punch on it, punched a hole on the side and put the ribbon thru and tied in a knot.
Hope you enjoyed looking. Please leave comments, I'd love to hear from you.